Update dependencies
The core feature is gradle refreshVersions is that it will lookup automatically for available updates for all the dependencies that it manages.
This is done in three small steps:
1. Run the refreshVersions Gradle task
Run the refreshVersions gradle task on the root project:
./gradlew refreshVersions
Hint: You don’t need to leave the IDE to run a Gradle task. IntelliJ has a handy action named “Execute Gradle Task”:
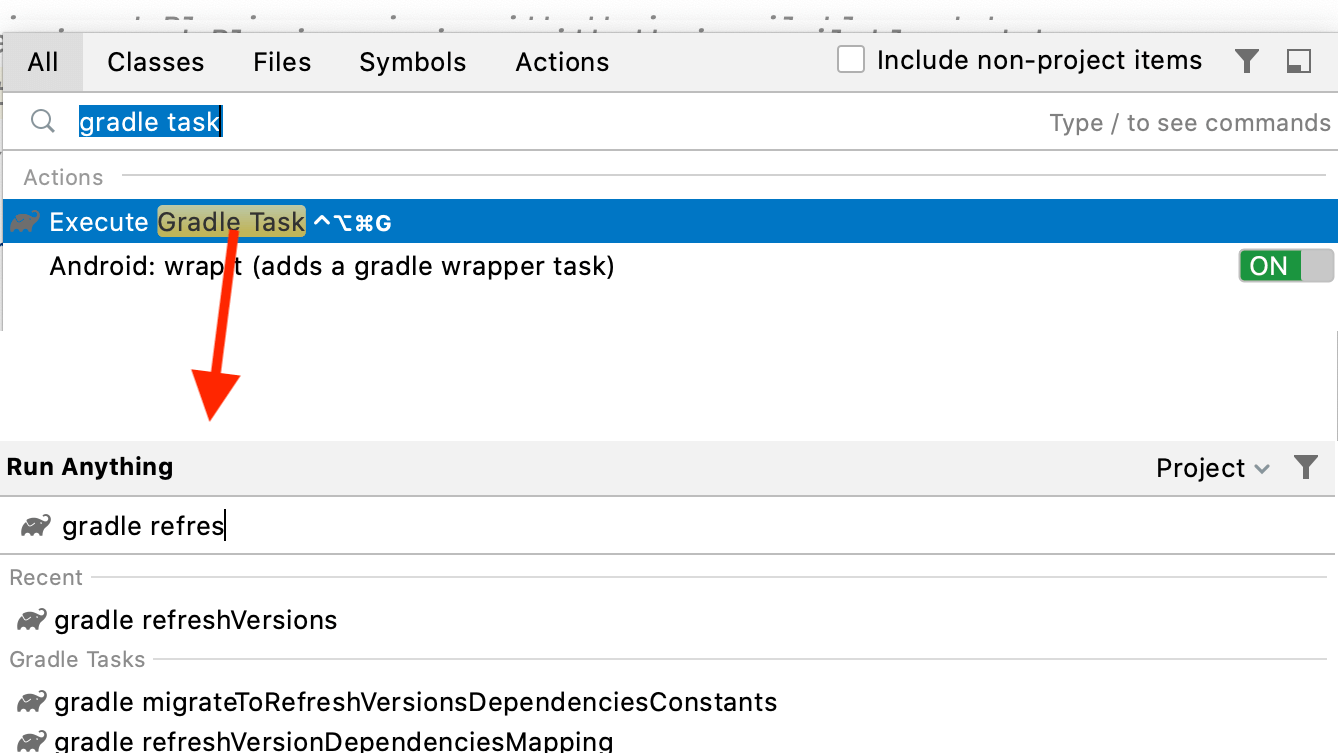
Gradle refreshVersions is fast: it usually takes less than 10 seconds to execute on relatively big projects.
2. Apply the updates you want to
Open the versions.properties file.
Let say you have this initial state:

After you have run the refreshVersions task, you will see the available updates as comments:

Why as comments?
Looking for available updates is certainly a job best done by a computer program (instead of you doing the monkey job of googling, clicking and scrolling for every single used dependency).
However, the decision of whether to upgrade or not, when, and towards which version, is best decided by the developers responsible like you.
Edit the versions.properties file
If you decide to update, just replace the previous version with the update:

If you decide to not update for now, you can leave the comments there.
They will not affect your build, and will serve as a reminder to revisit upgrading these dependencies later. They also allow you to glance at how behind the dependencies are, which is a way to estimate the technical debt of the project regarding the dependencies upgrades.
If you want to delete these comments, it’s possible too, and it’s safe. Running the refreshVersions task will bring them back (plus any newer available update).
3. Perform a Gradle sync/reload
The file versions.properties is part of the Gradle build.
Consequently, after you have edited it, you need to ensure the IDE gets the changes.
The action to do it have a different name depending on the IDE:
IntelliJ IDEA: Run the “Reload all Gradle projects” action (via ctrl/cmd + shift + A), or click the refresh arrows in the Gradle tool window
Android Studio: Run the “Sync Project with Gradle Files” action (via ctrl/cmd + shift + A), or click the elephant + arrow icon in the toolbar.
At that point, you probably want to:
- ⏭ Migrate deprecated symbols (if any)
- 🔨 Ensure the codebase still builds properly
- ✅ Ensure the tests still run properly
- 🕵️♀️ Do manual testing if needed
- ✅ Commit when appropriate
- 💝 Become our sponsor to thank us for the time saved 😉
Filter which versions are added to versions.properties
Maybe you don’t want alpha/beta versions to show up in versions.properties.
This is easy to configure with a rejectVersionIf { ... } predicate:
refreshVersions {
    rejectVersionIf {
        candidate.stabilityLevel != StabilityLevel.Stable
    }
}
refreshVersions {
    rejectVersionIf {
        candidate.stabilityLevel != StabilityLevel.Stable
    }
}
A perhaps better approach is to display development versions only if you are already using a development version at least as stable:
refreshVersions {
    rejectVersionIf {
        candidate.stabilityLevel.isLessStableThan(current.stabilityLevel)
    }
}
refreshVersions {
    rejectVersionIf {
        candidate.stabilityLevel.isLessStableThan(current.stabilityLevel)
    }
}
rejectVersionIf { ...} is pretty flexible, you can also use it to ban versions from specific version keys:
refreshVersions {
    rejectVersionIf {
        val blacklist = listOf("version.retrofit", "version.okhttp3")
        versionKey in blacklist
    }
}
refreshVersions {
    rejectVersionIf {
        def blacklist =  ["version.retrofit", "version.okhttp3"]
        versionKey in blacklist
    }
}
Or if you prefer for dependencies with specific maven coordinates:
refreshVersions {
    rejectVersionIf {
        val blacklist = listOf("com.squareup.retrofit", "com.squareup.okhttp3")
        moduleId.group in blacklist
    }
}
refreshVersions {
    rejectVersionIf {
        def blacklist = ["com.squareup.retrofit", "com.squareup.okhttp3"]
        moduleId.group in blacklist
    }
}
You can also combine all of the above to match your particular needs!